
Labor and Delivery — MCQs

On this page
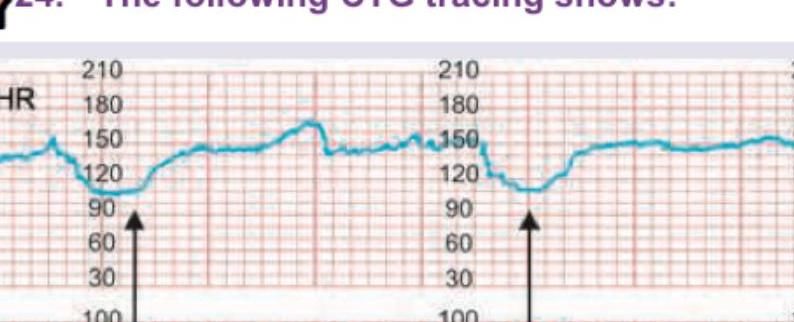
The following CTG tracing shows:
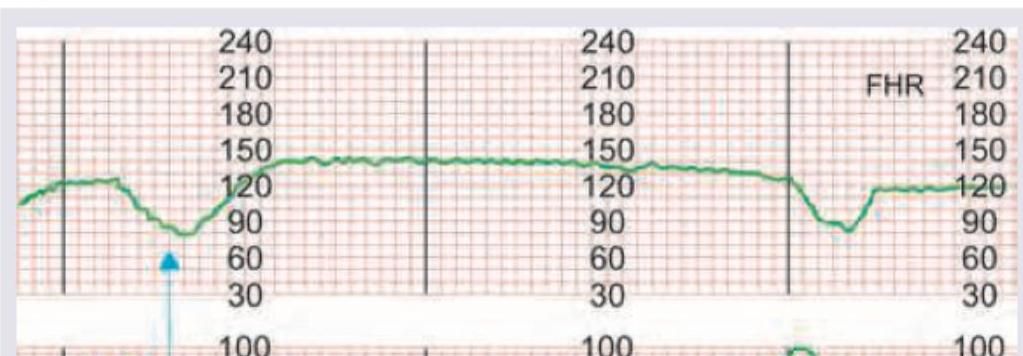
The following CTG shows:
The following CTG indicates:
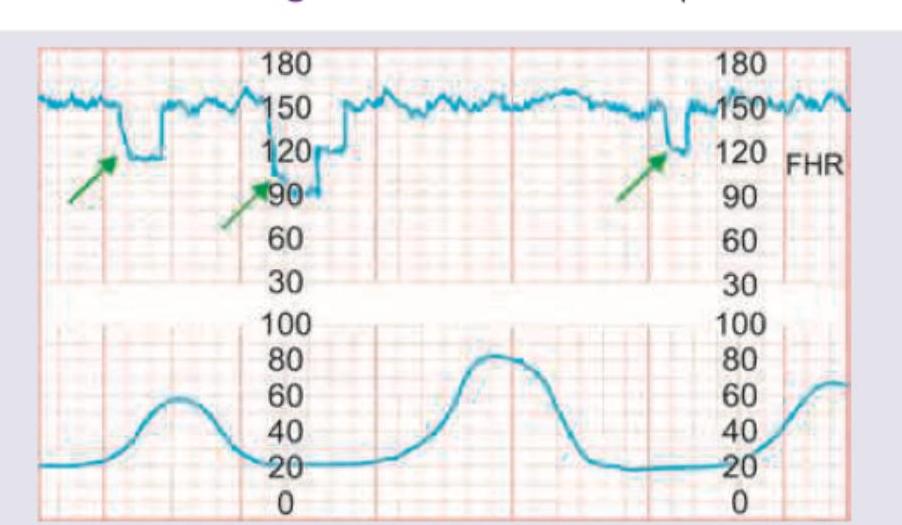
The following CTG indicates:

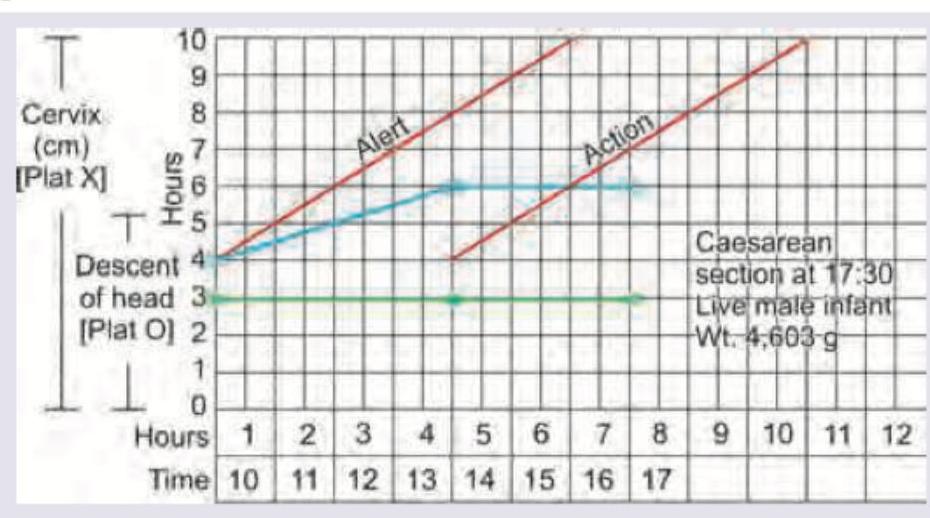
The following partogram shows:
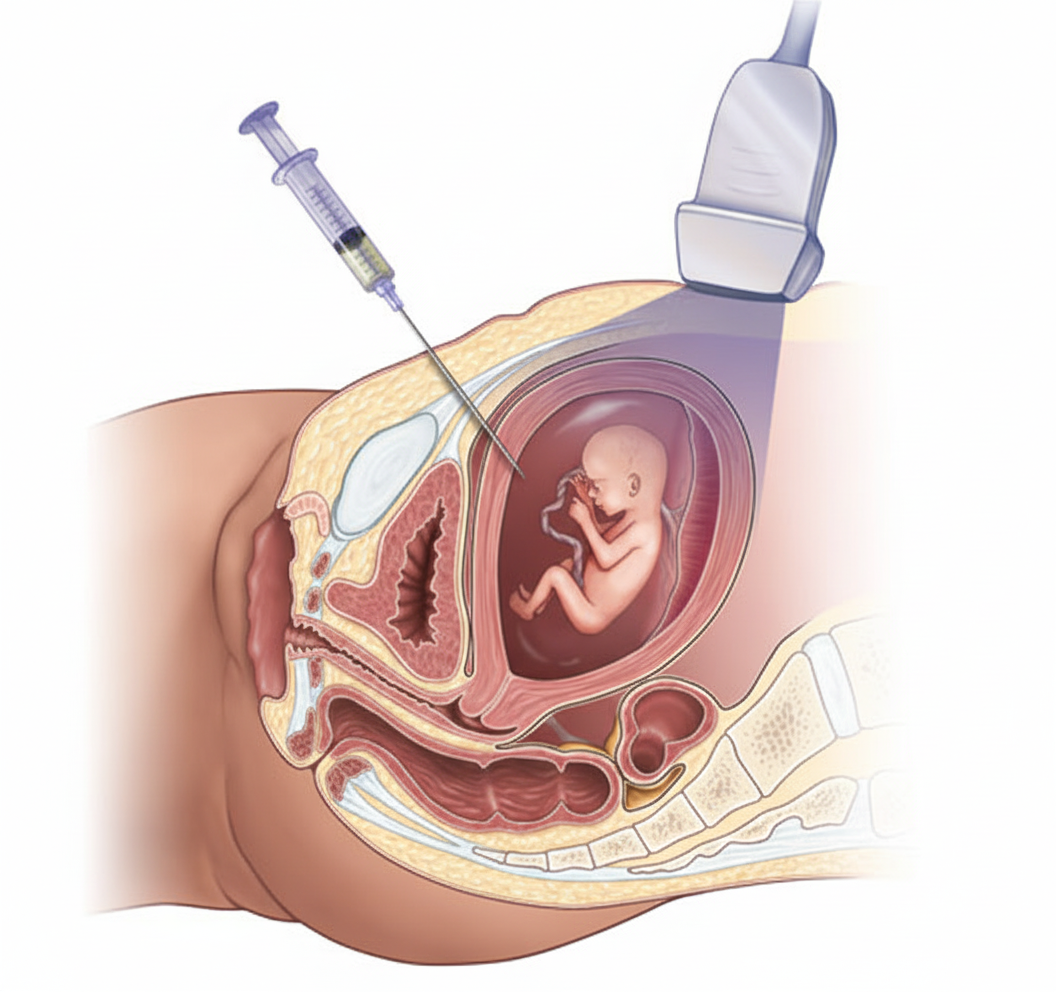
What procedure is being demonstrated in the image?
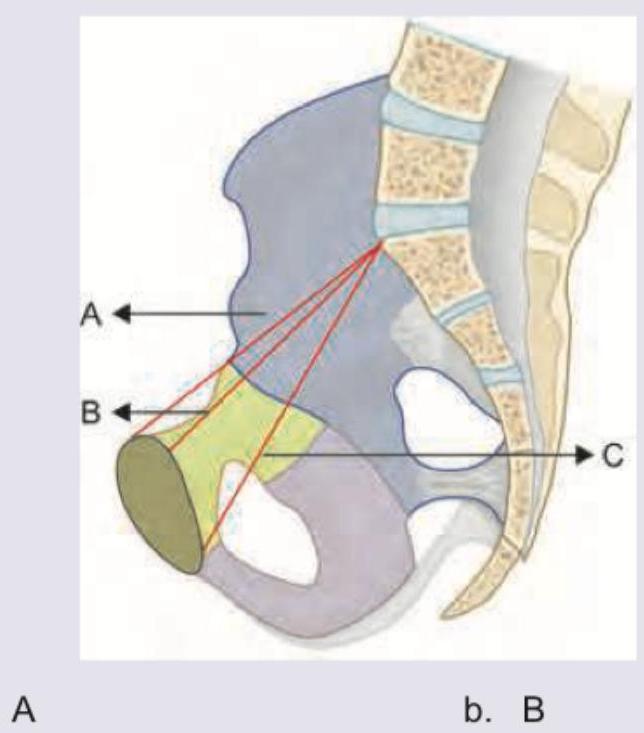
Which of the following is obstetric conjugate? (DNB Pattern 2018)
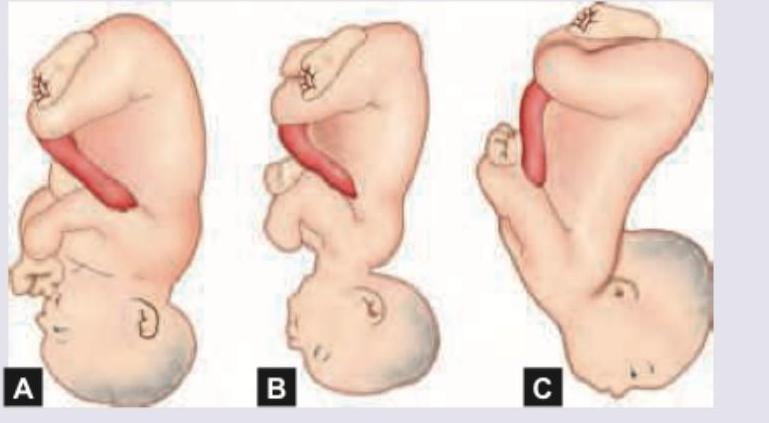
Which of the following combinations is correct? (DNB Pattern 2018)
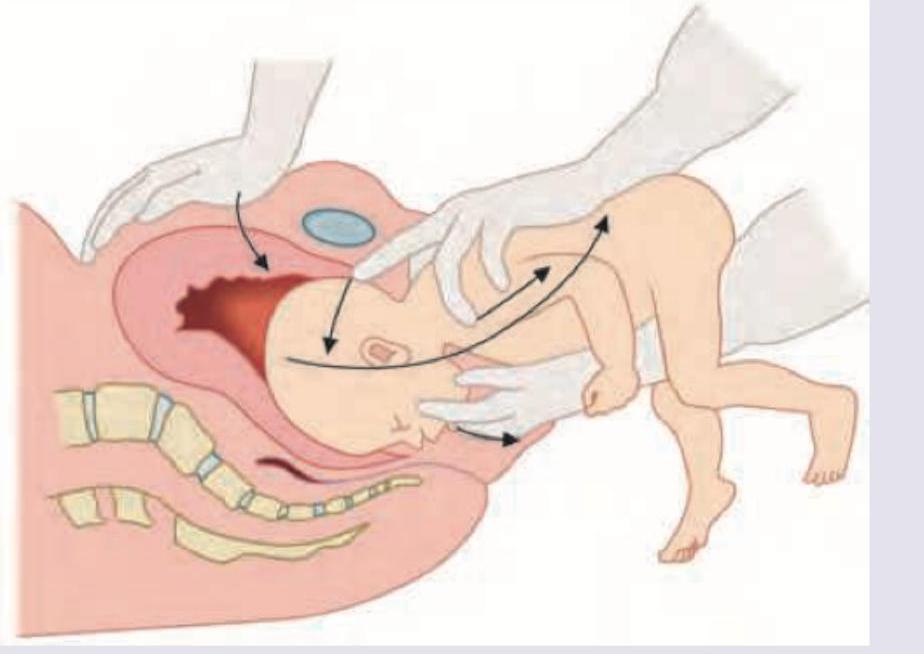
Name the maneuver shown in the image: (DNB Pattern 2018)
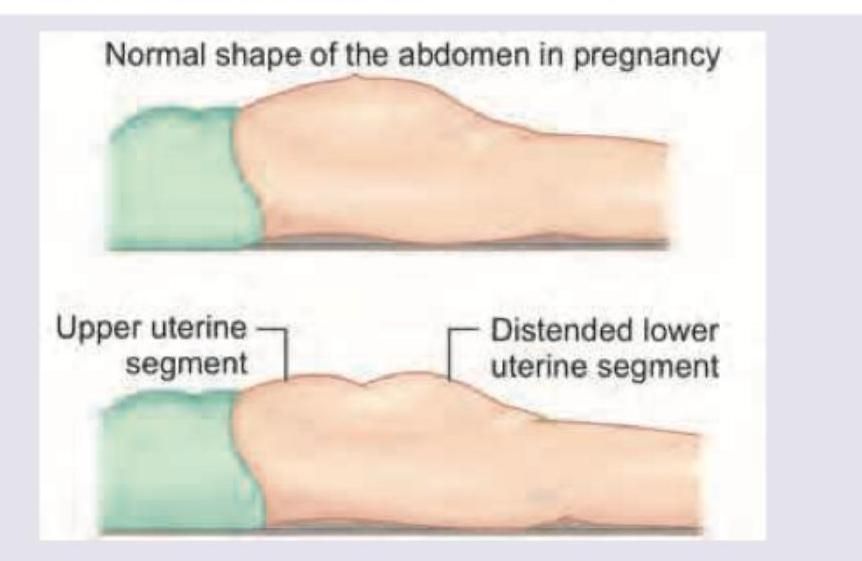
A 25-year-old primigravida has presented in obstructed labour. On examination she is exhausted and has a tender uterus with a groove felt per abdomen as shown in the image. Fetal parts are not felt. What is the diagnosis? (DNB Pattern 2018)
Practice by Chapter
Physiology of Labor
Practice Questions
Stages of Labor and Normal Progression
Practice Questions
Fetal Monitoring Techniques
Practice Questions
Pain Management in Labor
Practice Questions
Induction and Augmentation of Labor
Practice Questions
Operative Delivery (Forceps and Vacuum)
Practice Questions
Cesarean Section: Indications and Techniques
Practice Questions
Dystocia and Abnormal Labor Patterns
Practice Questions
Obstetric Emergencies
Practice Questions
Postpartum Hemorrhage Management
Practice Questions
Want unlimited practice?
Get full access to all questions, explanations, and performance tracking.
Scan to download app